Deskworks can automatically integrate all of your sales activity with QuickBooks Online (QBO). Each new member, order, discount and product will automatically display and post in QBO. Any order or charge for a product will be posted to the correct Chart of Accounts code in QBO, so you don’t have to manually code to ensure your Profit and Loss Statements are accurate.
Deskworks cannot integrate with QuickBooks Desktop as it does not work from an API (application programming interface).
Integrating Deskworks with QuickBooks Online (QBO)
To set up the integration, open a support ticket asking for the QBO integration to be activated for your site.
Note: This integration is available on the Pro Plan. If you’d like access or want to learn more about upgrading, submit a support ticket and our team will be happy to help.
Once activated, connect QBO and map your Chart of Accounts:
- In your browser, open QuickBooks Online with your login and password, and leave it open.
- In a new browser tab, open Deskworks.
- In the left menu bar, go to SETUP > INTEGRATIONS SETUP

- Under QUICKBOOKS APPLICATIONS, click ADD+ and enter an Application Name.
- If you have more than one QBO instance, repeat this process for each.
- Under QUICKBOOKS CENTERS, tick the "Enabled" box for each center that you want connected to QBO.
- A "QuickBooks Application" dropdown will appear. Select the correct QBO Application.
- If you have more than one center, you can choose to add all centers to one instance of QBO, or you can attach each one to a separate instance of QBO.
- If you have multiple centers going to one instance of QBO, you can select which "QuickBooks Class" you want the sales for each center directed to.
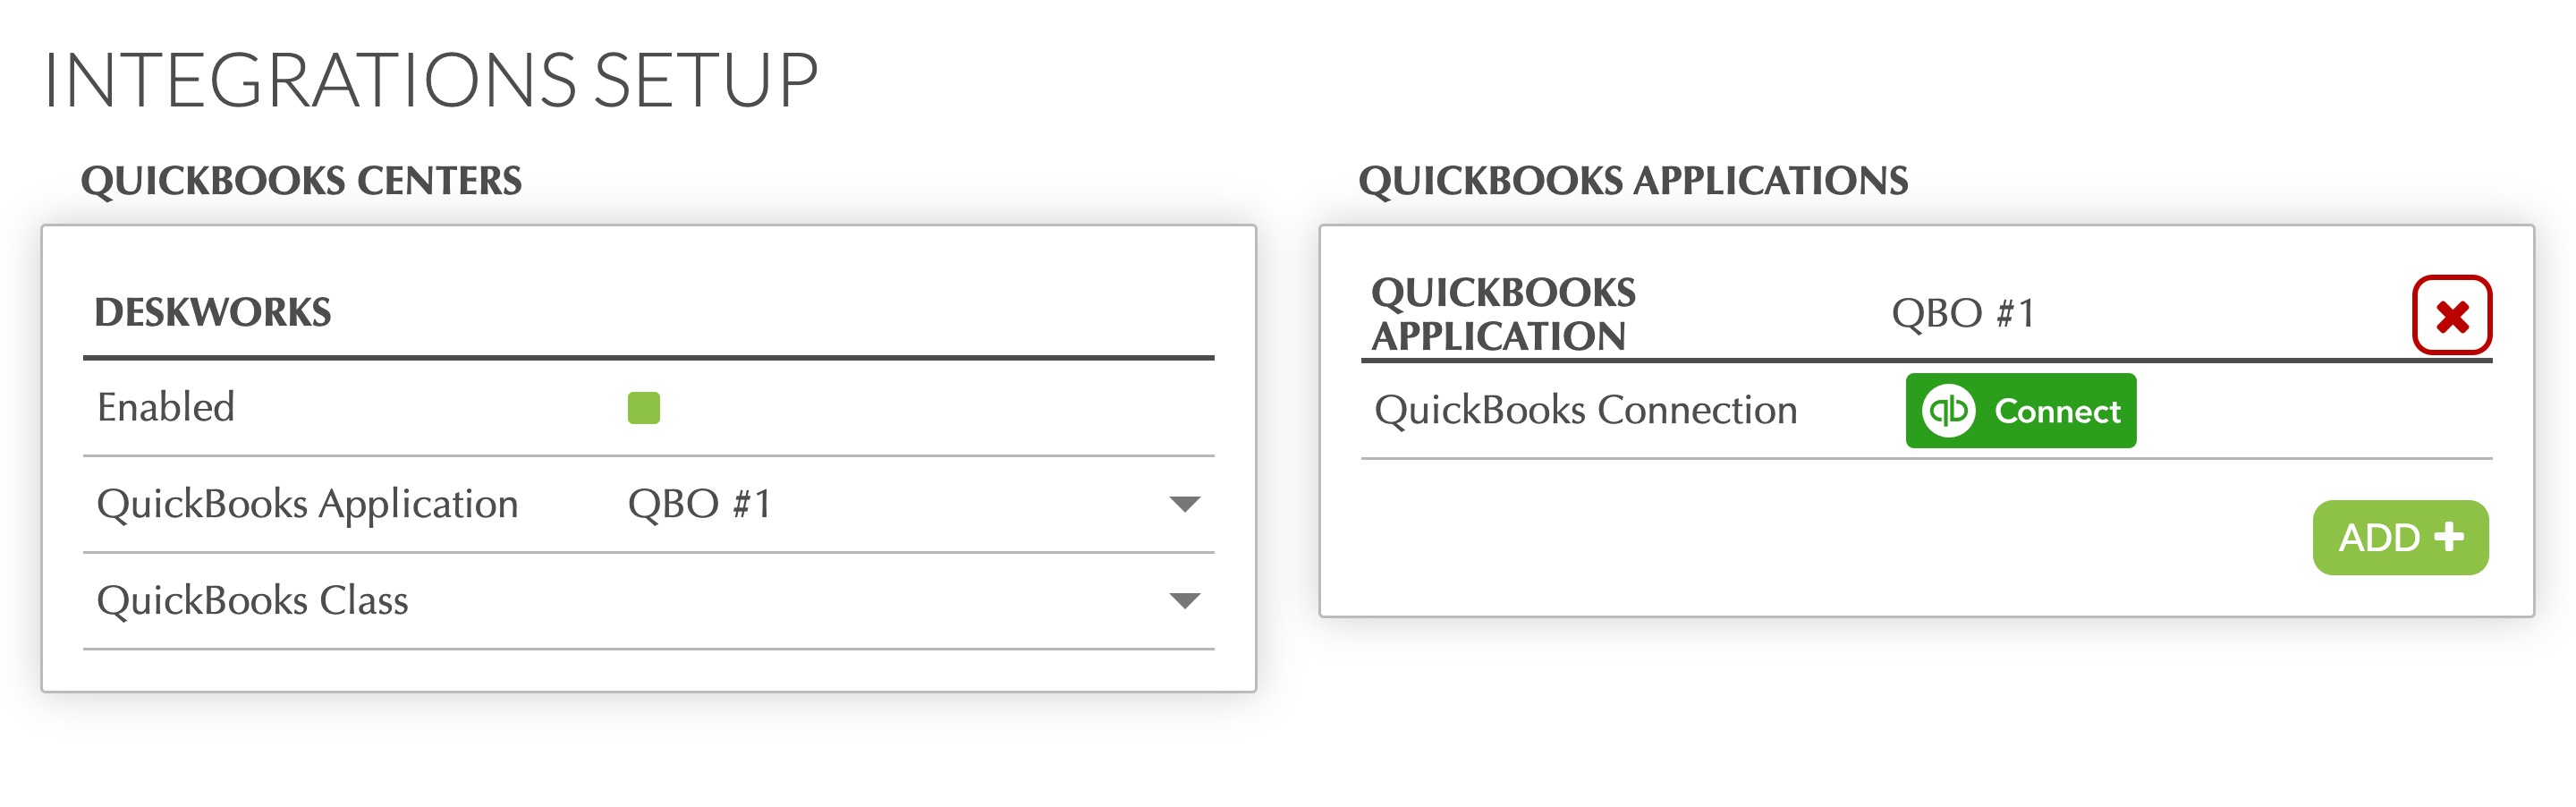
- Click the green "qb Connect" button. The button disappears once you are connected so that you can’t lose the connection in error.
- Deskworks is now reading your QBO Chart of Accounts. Map the Deskworks information to the correct QBO Accounts in the dropdowns. You may want your accountant to advise on these:
- Map the Security Deposits and the Security Deposit Liabilities to the correct QBO accounts.
- Map Accounts Receivable to the correct QBO account.
- Map sales for Custom Products, i.e. those that are not in your inventory, to a QBO product.
- Map Discounts to a QBO product.
- Map Non-Members to a QBO Customer. (All non-members are recorded on the same QBO Customer account.)

Next, map your QBO GL Account Codes to Deskworks products:
- Go to INVENTORY > PRODUCTS. Click EDIT on your first product.
- In the "QuickBooks Account" field, select the correct Chart of Accounts code for this product from the dropdown menu. Repeat for all products.
- As you make changes in QuickBooks to the Income Accounts of your Chart of Accounts, those changes are instantly reflected in Deskworks.
- You can always update the QuickBooks Account field in Deskworks. History will remain the same; new orders will reflect the changed codes.
- Once all mapping is complete, open a support ticket requesting we push your existing members to QBO.
- We do this so that data doesn’t transfer to QBO before you’re ready.
Testing the QuickBooks Online Integration
Once QBO is connected and mapped, it's time to test.
- Create a new invoice in Deskworks and add a charge. Confirm that it immediately shows up in QuickBooks as a sale (with the correct class, if you have used QB classes.)
- Review your Products in QuickBooks. Confirm all of your Deskworks products display the correct Chart of Accounts Income code.
- Delete the invoice in Deskworks. Confirm that it's removed from QuickBooks.
Note: If you use authorize.net as your credit card gateway, you can activate QuickBooks download to fully automate from order to receipt of funds!Was this article helpful?
That’s Great!
Thank you for your feedback
Sorry! We couldn't be helpful
Thank you for your feedback
Feedback sent
We appreciate your effort and will try to fix the article