This article explains how to upload your printer history report into Deskworks to post 1-click print charges to your members CURRENT CHARGES for automated billing.
Note: Before uploading a report, you must first map your printer history report in Deskworks. If you haven’t completed this step yet, follow these instructions: Printer History Mapping →
Once your printer report is mapped, you can upload it at any time and post charges quickly and easily.
Steps to Upload Your Printer Report
- Generate and save the printer report
Log into your printer and generate a history report for the applicable time period.
Save the report as a .CSV file on your computer.
Upload the report into Deskworks
In Deskworks:
Go to ACCOUNTING > PRINTER USAGE UPLOAD.
Click IMPORT FROM CSV and select your printer history report file.

Edit the uploaded report
A new print import entry will appear at the top of the screen.
Click the EDIT pencil icon next to the new entry.
Name and review the upload
On the next screen, you can:
Rename the upload (labeling it with the report’s time period is recommended).
Delete the upload if needed.
Post charges from the upload.
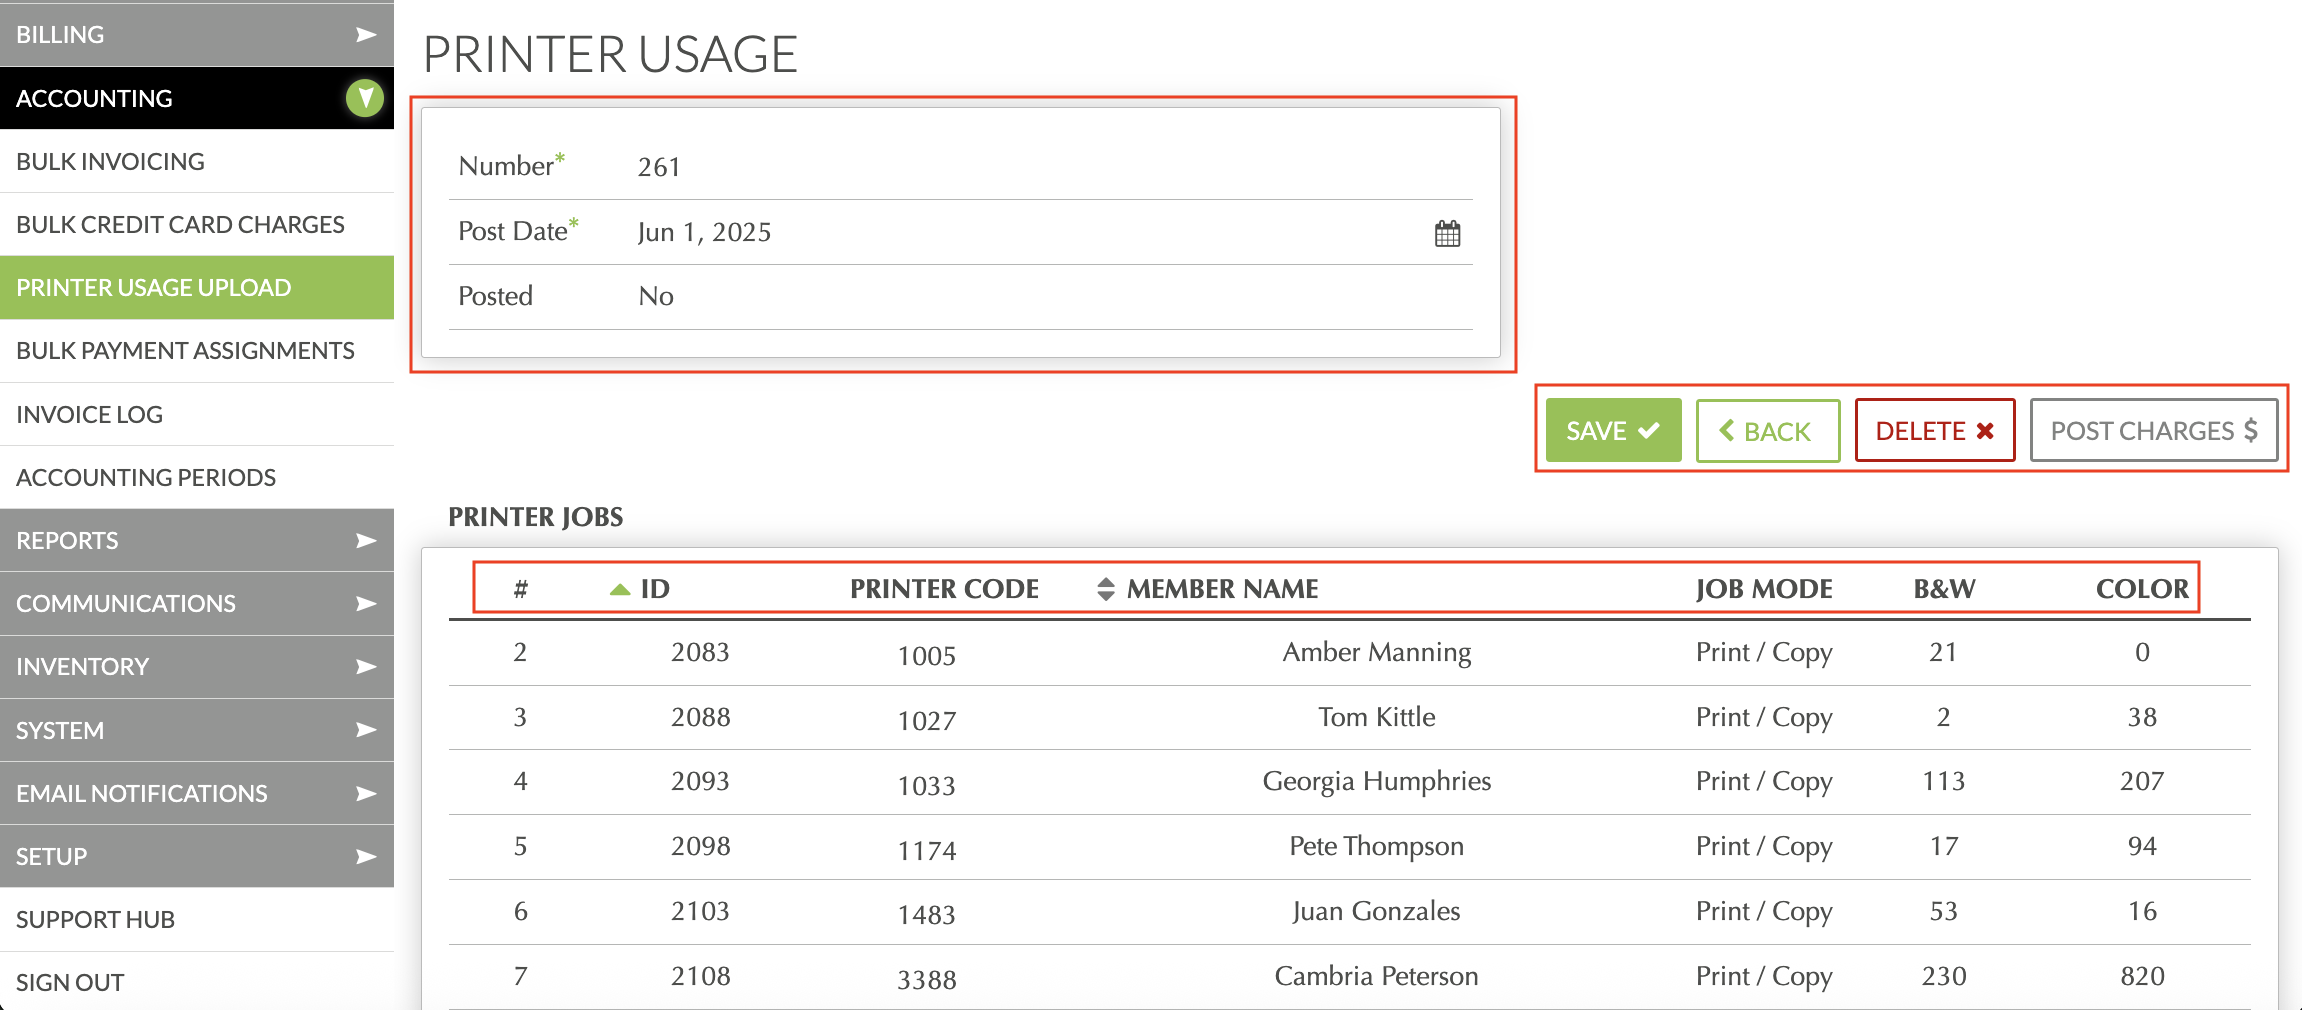
Before posting charges:
- Scroll down to review the upload contents.
- Each charge will appear as a line item showing the printer code, member name, job mode (if applicable), and page count.
Error Handling
Any entries marked with a red warning icon will not post charges. Hovering over the icon will give you more details about the error. This typically occurs when a printer code in the report is not linked to a member profile.

To resolve an "Unknown printer code" error:
- Search for the member in User Search or SmartSearch.
- Select the member and go to MEMBERS > VIEW/EDIT PROFILE.
- Scroll down to the PRINTER CODES section.

- If the member profile is missing a printer code, click ADD+ to enter a new one. You can also click EDIT to modify an existing one.
- Repeat this process for all errors.
- Return to ACCOUNTING > PRINTER USAGE UPLOAD, delete the upload with red lines, and re-upload the report.
- All lines should now display without error, indicating charges will be posted.
Posting Print Charges
When ready:
- Click POST CHARGES.
- Charges will be created for each member with print jobs in the report.
- Review the posted charges in BILLING > CHARGES/PAYMENTS.

Was this article helpful?
That’s Great!
Thank you for your feedback
Sorry! We couldn't be helpful
Thank you for your feedback
Feedback sent
We appreciate your effort and will try to fix the article